How to Set Up SuperRack with DiGiCo Quantum 5, 225 and 338
Follow these instructions to setup a DiGiCo Quantum console & Waves SuperRack SoundGrid with ProLink console remote integration. Quantum 7 setup instructions can be found here.
Let’s start with a list of all hardware, software and peripherals you will need to set this up:
- One DiGiCo Quantum console (SD users, please follow the instructions here) with a Waves I/O. .
- A computer, running either Windows or Mac that fully supports SuperRack SoundGrid with:
- SuperRack SoundGrid installed and licensed./li>
- SoundGrid supported plugins.
- A USB flash drive for Waves licenses (optional).
- At least one SoundGrid Server to process plugins.
- At least three compatible Ethernet cables at supported lengths (you should always have a few extras with you).
- A SoundGrid supported network switch (if you wish to use more than one server).
Install and Activate Waves SuperRack SoundGrid and Plugins on the host computer:
- First, make sure that your computer fully supports running SuperRack SoundGrid and your Waves plugin versions.
- Install and activate Waves licenses on your host computer:
- Download and install Waves Central
- Launch Waves Central and login to your Waves account
- On the ‘Install Products’ tab, Select SuperRack SoundGrid and your plugins and/or bundles.
- Click “Install”.
- In Waves Central, go to the ‘Licenses’ tab, and select ‘Not Activated’.
- Select the licenses for SuperRack SoundGrid and your plugins and/or bundles.
- On the right panel, select the Target Device for Licenses. Either the computer or a USB flash drive.
- Click on Activate.
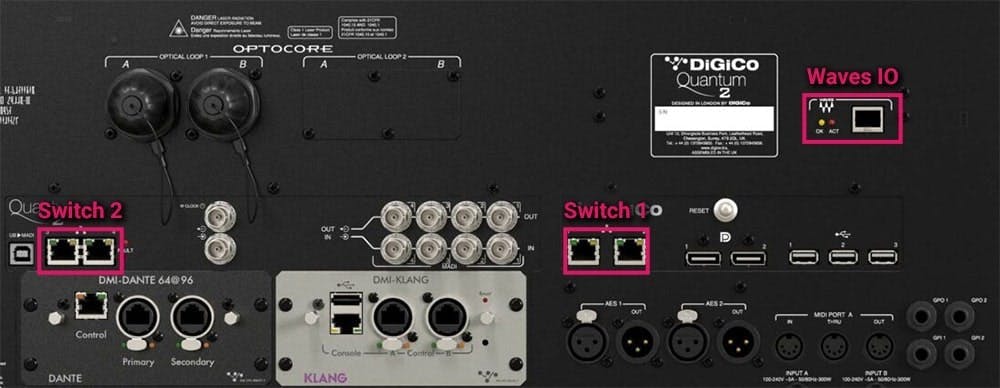
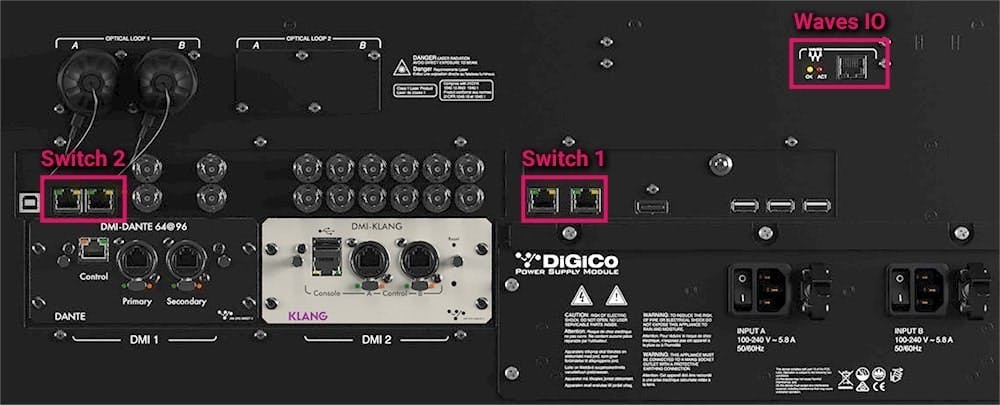
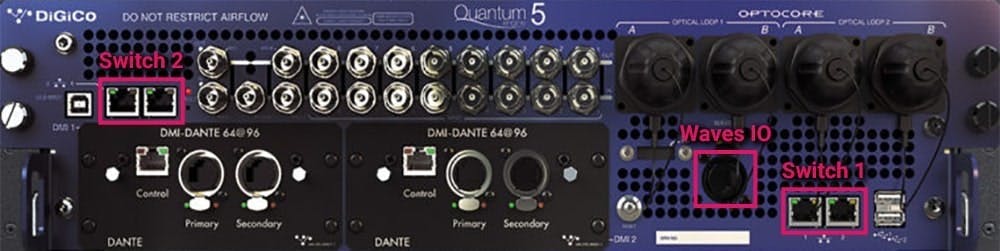
Let’s take a look at the back panel of DiGiCo Quantum 5, 225 and 338 consoles. We can see a Waves IO network port and two network switches on each model:
- A pair of network ports marked 1 & 2 – we’ll call this pair ‘Switch 1’
- A pair of network ports marked 3 & 4 – we’ll call this pair ‘Switch 2’
Q225:
Q338:
Quantum 5:
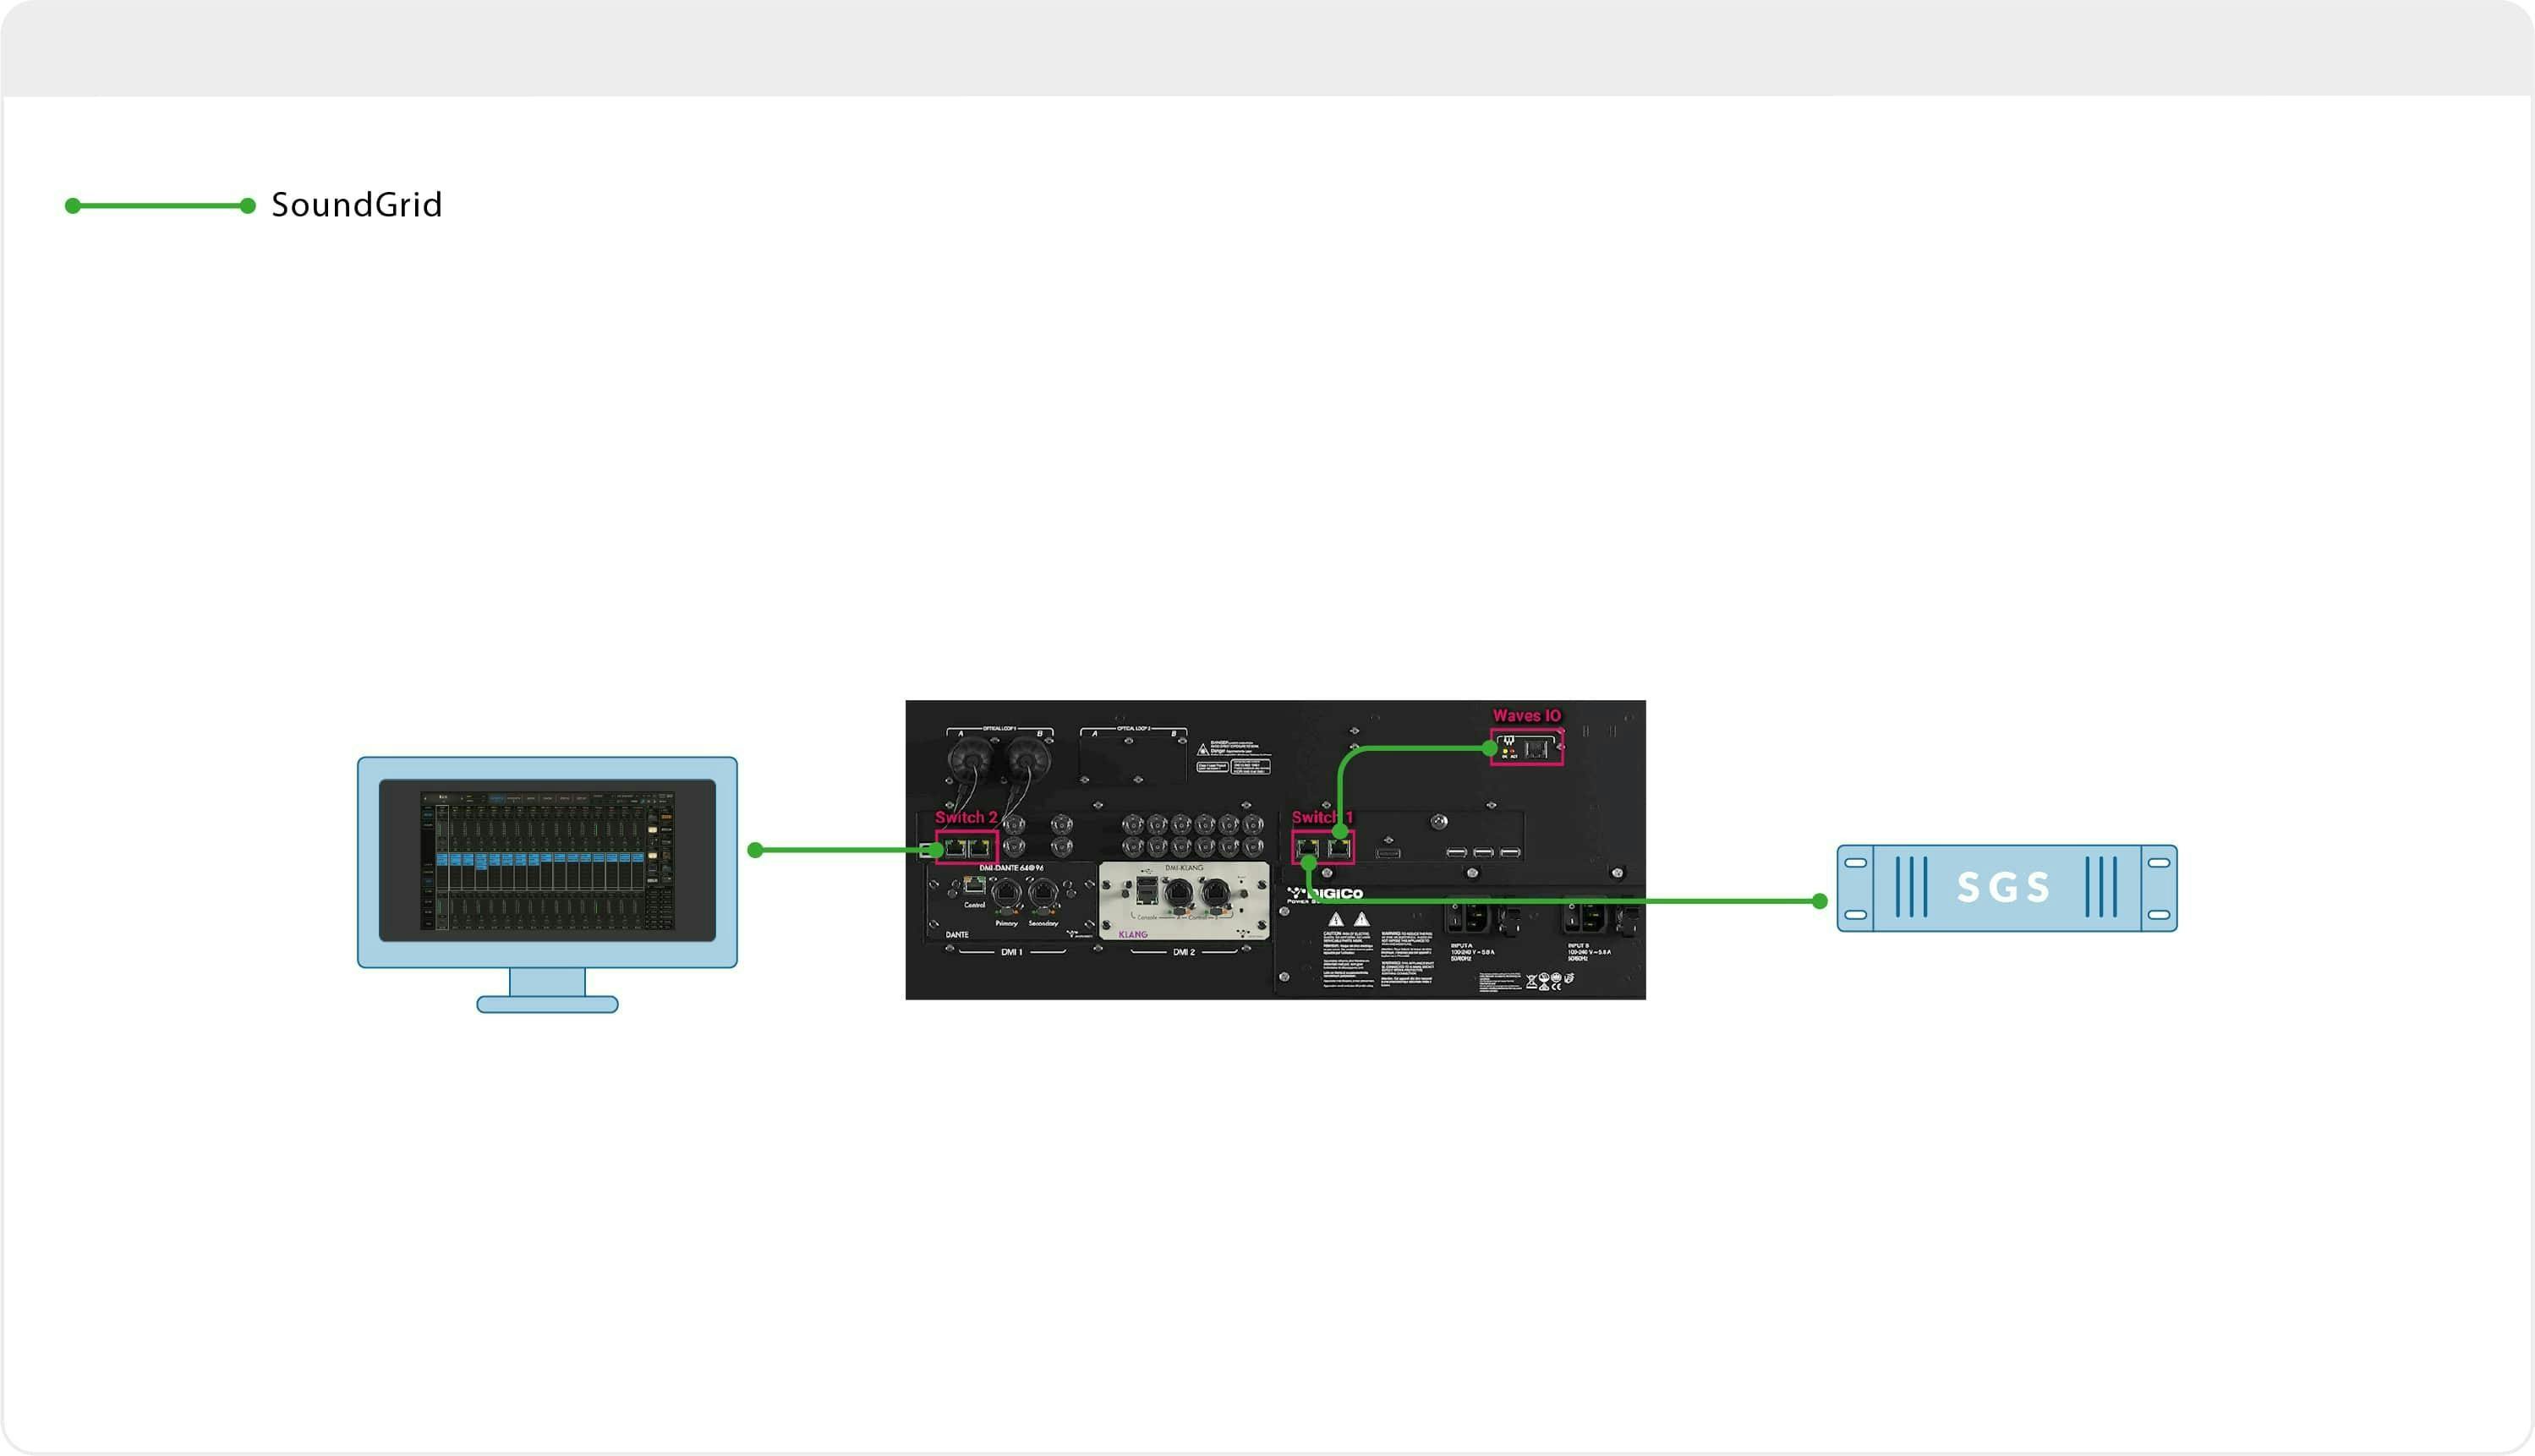
Connecting a Quantum console to SuperRack SoundGrid and one server
- Connect the Waves IO and Soundgrid server to ports 1 and 2.
- Connect the host computer running SuperRack SoundGrid to port 3 or 4.
Important: The Waves IO and SoundGrid Server must be connected to the same switch. Connecting them to different switches may result in audio drops.
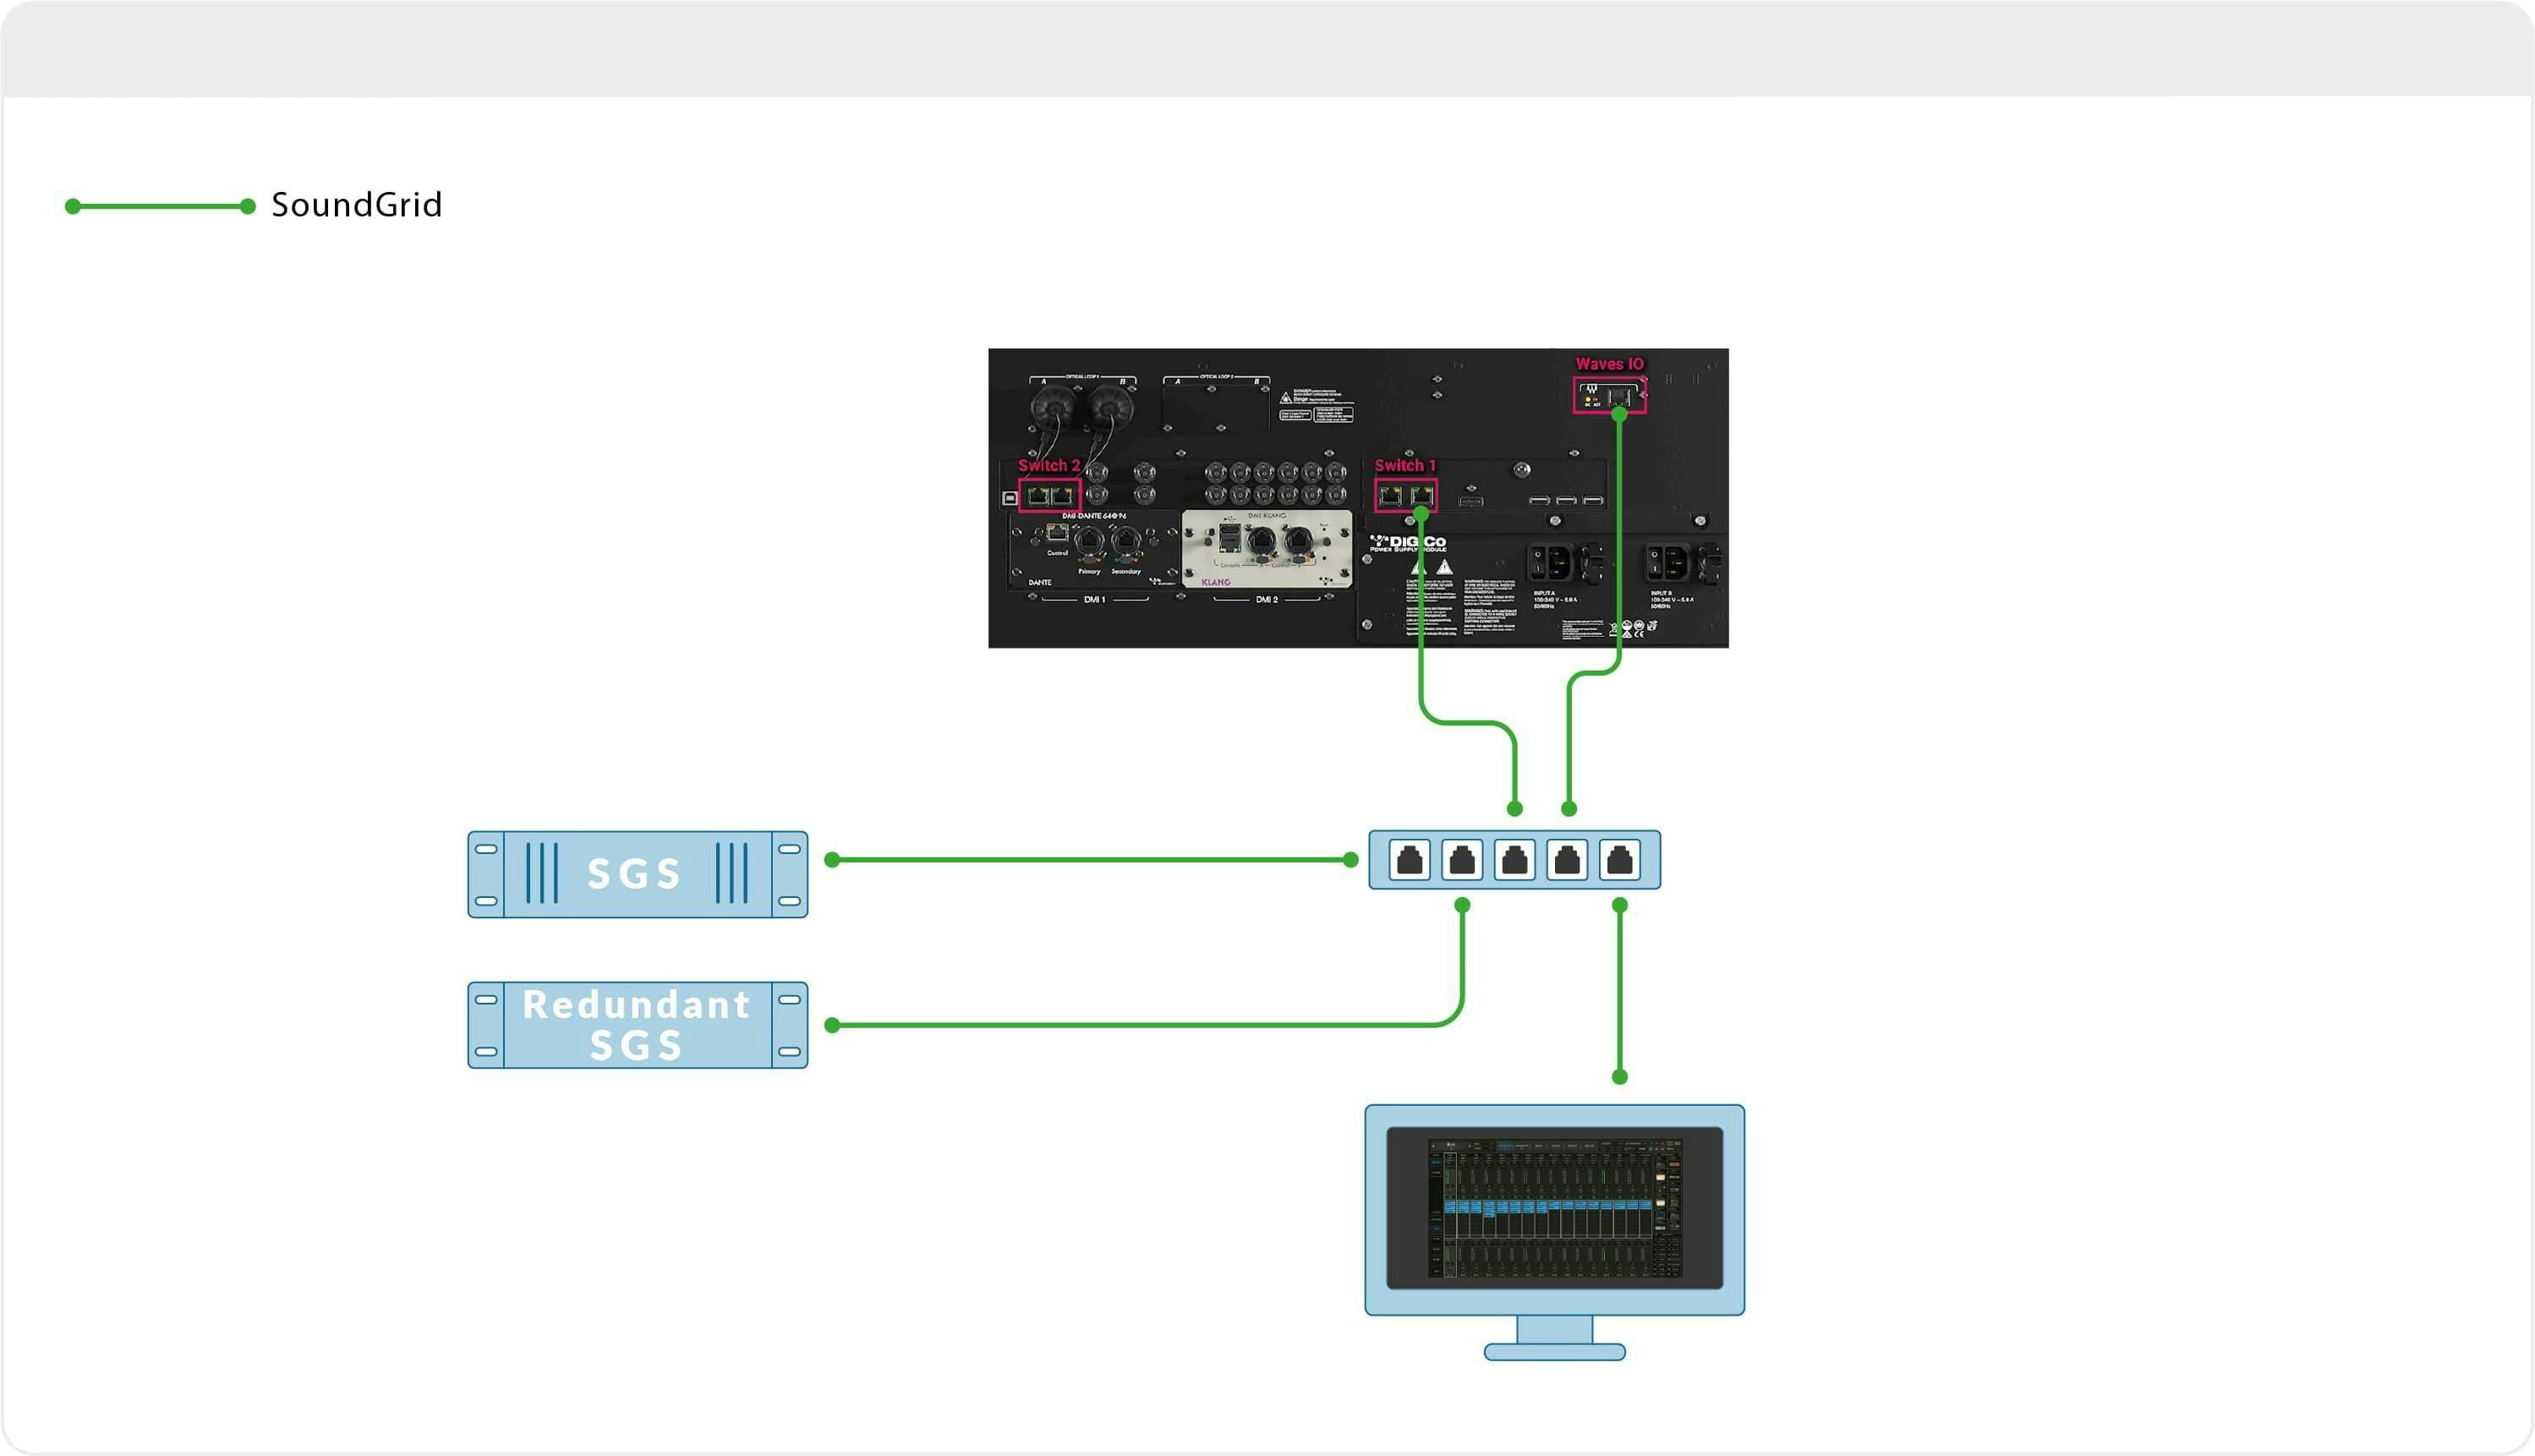
Connecting a Quantum console to SuperRack SoundGrid and two or more servers
Connect the following to an external SoundGrid supported network Switch.
- Waves IO
- SoundGrid Server #1
- Server #2 - for redundancy or additional processing power
- Quantum console port 1 or 2
- The host computer running SuperRack SoundGrid
Important:
- The Waves IO and SoundGrid server must be connected to the same switch. Connecting them to different switches may result in audio drops.
- We highly recommend that both servers be of the same model and generation.
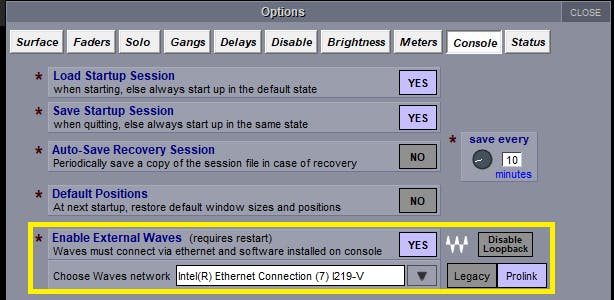
- Go to Options > Console tab.
- Under Enable External Waves click YES and make sure the NIC of the console is chosen as Waves network.
- Select ProLink if not already selected. Select Legacy if running SuperRack V14.23 and below.
- Power cycle the console.
- Launch SuperRack SoundGrid on the host computer.
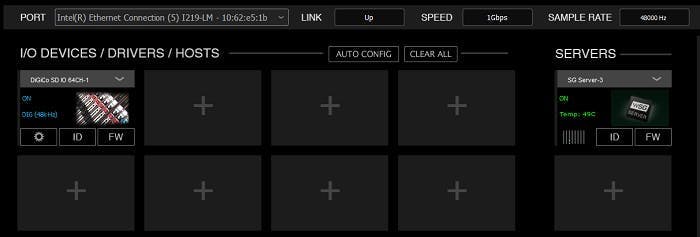
- In the Setup tab, under Port, choose the host computer’s LAN port that is used for SoundGrid.
When a valid SoundGrid Port is recognized, the link status will show “Up” and the speed should show 1GBps.
- Assign the Waves SD I/O and server/s in the I/O, Devices, Hosts and Servers panels respectively.
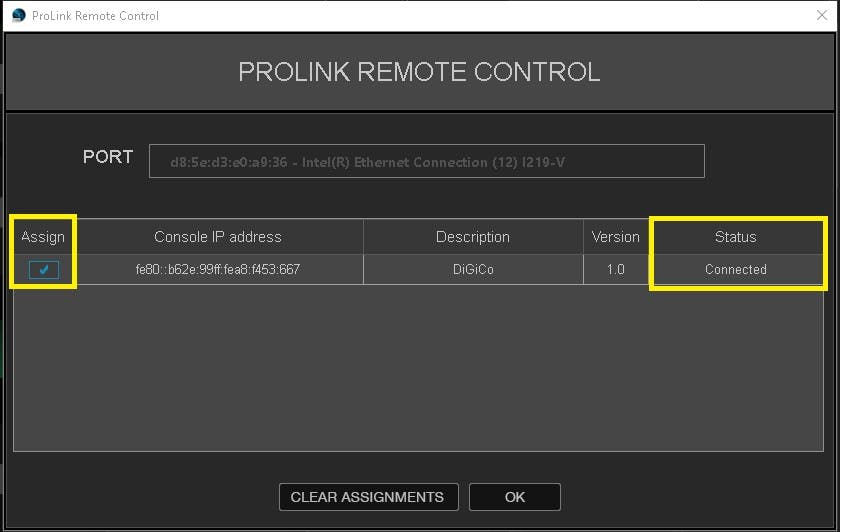
- In SuperRack’s Setup tab under Controllers, assign the ProLink Console Remote Control module.
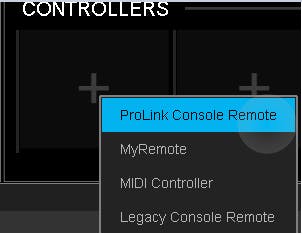
- Click on the gearbox to open the panel.
- The network port will be assigned automatically (ProLink only).
- Assign the console. The status should change to Connected.
- Windows: C:\Users\Public\Waves Audio\SuperRack SoundGrid\Integrated Sessions
- Mac: Mac HD > Users > Shared > Waves Audio > SuperRack SoundGrid SoundGrid > Integrated Sessions
 * If using Legacy console remote, you need to select the network port manually. Select the same network port used for your SoundGrid network.
A session load command will pass from the console to SuperRack. If there is no matching session in SuperRack’s integrated sessions folder, SuperRack will load an empty session.
SuperRack SoundGrid Integrated session folder location:- In SuperRack’s Setup tab under Controllers, assign the ProLink Console Remote Control module.
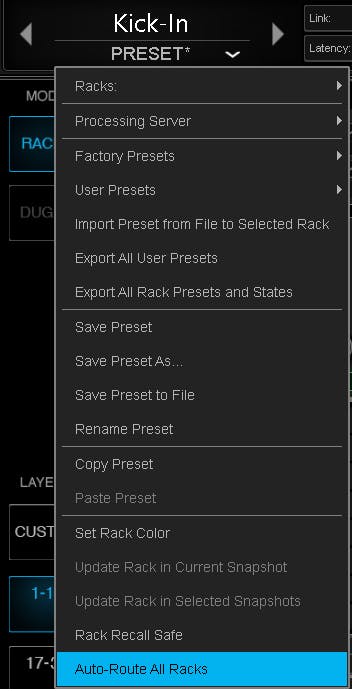
Now that your devices are assigned, you can route audio to the racks manually or automatically. To route automatically, go to the menu at the top left corner and choose Auto-Route.
- Choose which bank to route to, A or B.
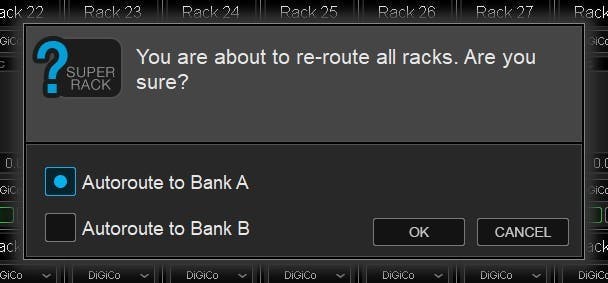
SuperRack will now patch racks to the card in fixed routing. 1-1, 2-2, 3-3, etc.
If you require a different routing scheme, you can patch racks manually. Refer to the SuperRack manual for more information on routing.