How to Set up SuperRack SoundGrid on DiGiCo SD7
Apr 15, 2024
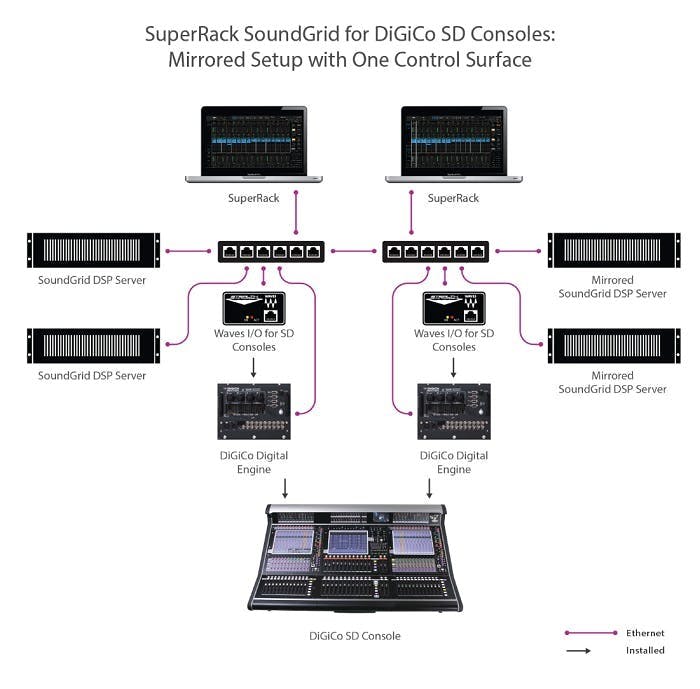
Follow these instructions to set up a fully redundant DiGiCo SD7 & Waves SuperRack SoundGrid setup, incorporating two mirrored SD7 engines with separate yet mirrored SoundGrid setups.
Let’s start with a list of all hardware, software and peripherals you will need to set this up:
- One DiGiCo SD7 Console with two Waves I/Os for DiGiCo SD consoles, one on each engine.
- Two computers, running either Windows or Mac that fully support SuperRack SoundGrid, each with:
- SuperRack SoundGrid installed and licensed separately on each host computer.
- Two identical bundles of Waves plugins installed and licensed separately on each host computer. Plugins version must be identical on both computers.
Important note: Mirroring is supported only when both host computers run the same OS version, the same version of SuperRack, and the same version of Waves plugins. For example: two computers, each running Windows 10, SuperRack V12, and V13 Waves plugins; or two computers, each running macOS 10.15, SuperRack V12, and V12 Waves plugins.
- Two USB Flash Drives for Waves licenses (optional).
- At least two identical SoundGrid Servers to process plugins, with the option to add more servers for additional processing power or redundancy.
- Two identical SoundGrid supported network switches.
- At least nine SoundGrid compatible Ethernet cables at supported lengths (you should always have extras with you).
Install and Activate SuperRack SoundGrid and your Waves Plugins on both host computers:
- First, make sure that both computers fully support running SuperRack SoundGrid and your Waves plugin versions.
- Install and activate Waves licenses on host computer A:
- Download and install Waves Central
- Launch Waves Central and login to your Waves account
- On the ‘Install Products’ tab, Select SuperRack SoundGrid and your plugins and/or bundles.
- Click “Install”.
- Repeat step #2 on Computer B.
- In Waves Central, go to the ‘Licenses’ tab, and select ‘Not Activated’.
- Select the licenses for SuperRack SoundGrid and your plugins and/or bundles.
- On the right panel, select the Target Device for Licenses. Either the computer or a USB flash drive.
- Click on Activate.
- If you chose to activate your licenses directly to the computer, repeat the activation steps on host computer B. If you chose to activate to USB drives, swap out the first USB drive for the second one and repeat the activation steps.
- If you have DiGiCo SD7 Quantum engine/s click here for specific instructions.
- Mark all your hardware and cables! Associate switches and servers to Engines A or B.
- Connect the following to Switch A with compatible ethernet cables at supported lengths:
- DiGiCo Digital Engine A
- Waves I/O A
- Host Computer A
- Server #1 - A Primary
- Server #2 (optional) – A Redundant/additional server
- Connect the following to Switch B with compatible ethernet cables at supported lengths:
- DiGiCo Digital Engine B
- Waves I/O B
- Host Computer B
- Server #1 - B Primary
- Server #2 (optional) – B Redundant/additional server
- Power everything up.
- Do not connect an ethernet cable between Switches A and B for now!
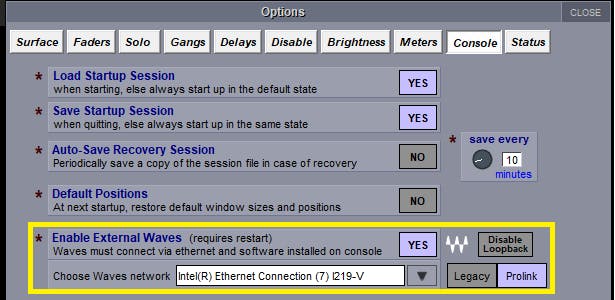
- Go to Options > Console tab.
- Under Enable External Waves click YES and make sure the NIC of the console is chosen as Waves network.
- Select ProLink if not already selected. Select Legacy if running SuperRack V14.23 and below.
- Repeat steps 1-3 on Engine B.
- Power cycle the console.
- Launch SPRK on Computer A.
- In the Setup tab, under Port, choose the host computer’s LAN port that is used for SoundGrid. When a valid SoundGrid Port is recognized, the link status will show “Up” and the speed should show 1GBps.

- Assign the DiGiCo Waves I/O and server in the I/O, Devices, Hosts and Servers panel respectively.
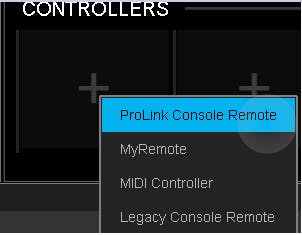
- Set up ProLink Console Remote:
- In SuperRack’s Setup tab under Controllers, assign the ProLink Console Remote Control module.
- Click on the gearbox to open the panel.
- The network port will be assigned automatically (ProLink only).
- Assign the console. The status should change to Connected.
* If using Legacy console remote, you need to select the network port manually. Select the same network port used for your SoundGrid network.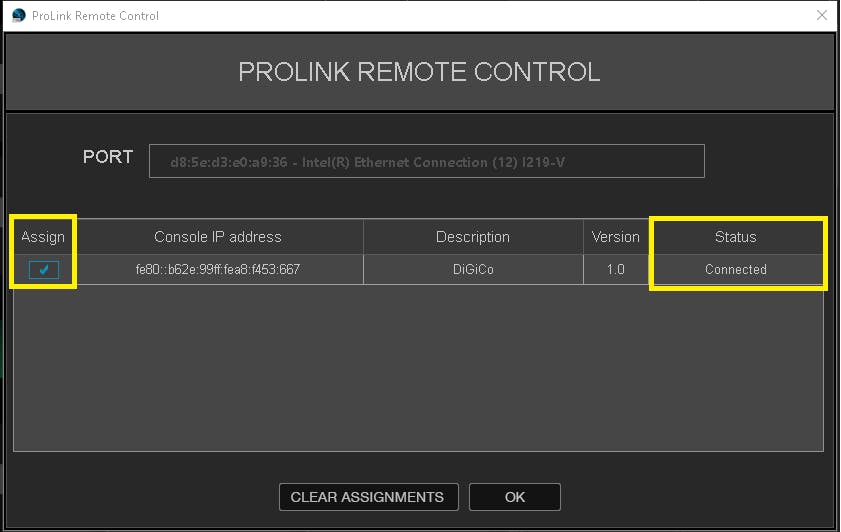
 A session load command will pass from the console to SuperRack. If there is no matching session in SuperRack’s integrated sessions folder, SuperRack will load an empty session.
SuperRack SoundGrid Integrated session folder location:- Windows: C:\Users\Public\Waves Audio\SuperRack SoundGrid\Integrated Sessions
- Mac: Mac HD > Users > Shared > Waves Audio > SuperRack SoundGrid SoundGrid > Integrated Sessions
- In SuperRack’s Setup tab under Controllers, assign the ProLink Console Remote Control module.
- Repeat steps 1-5 on Computer B!
- Connect a cable between Switches A and B.
The instructions below assume that you properly configured network communication between the two consoles/engines about to be mirrored.
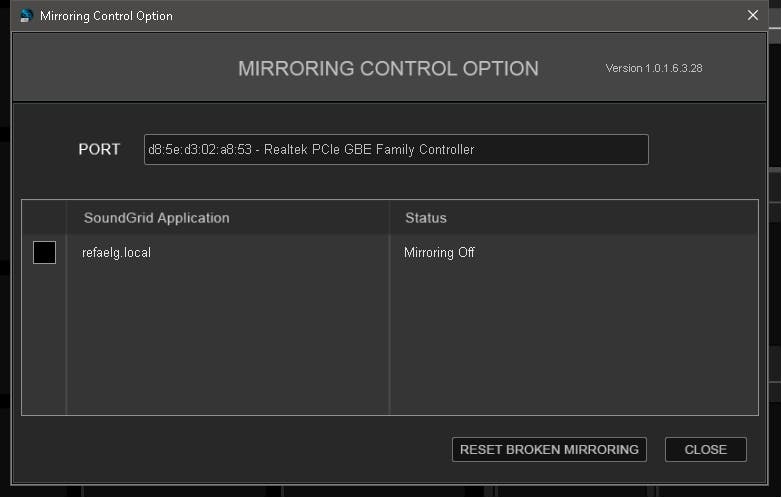
- In the SuperRack Setup tab under Controllers, assign the Mirror Control module on both computers.
- Click on the gear wheel to open the panel.
- The network port will be assigned automatically (starting from SuperRack v14.30).
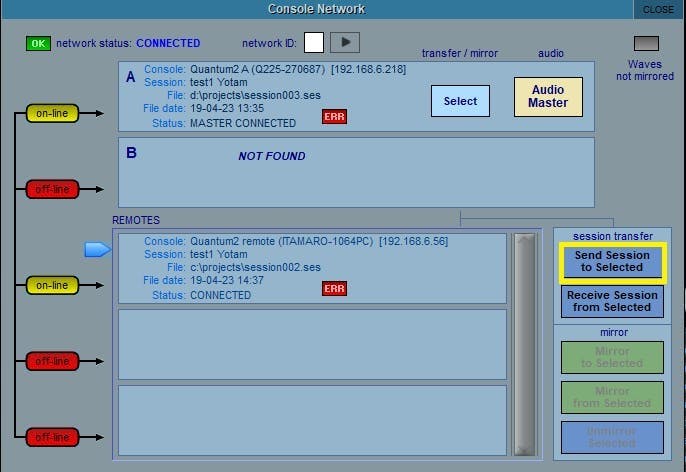
- On DiGiCo engine A, go to Network and click "send session to selected".
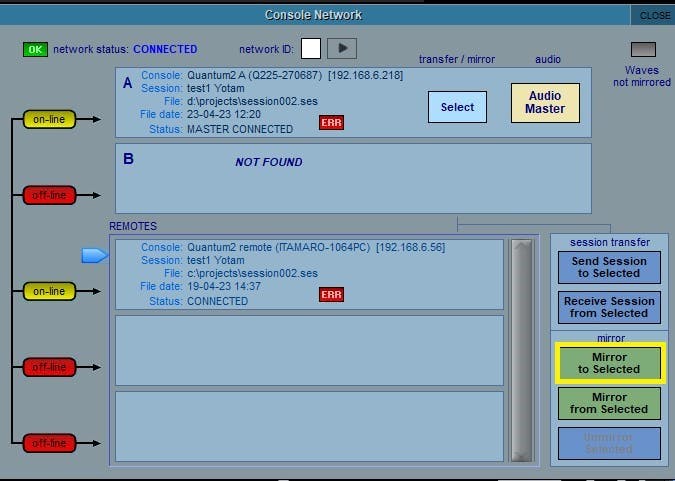
- Once both SuperRack B and Engine B have received the session, click 'Mirror to selected'.
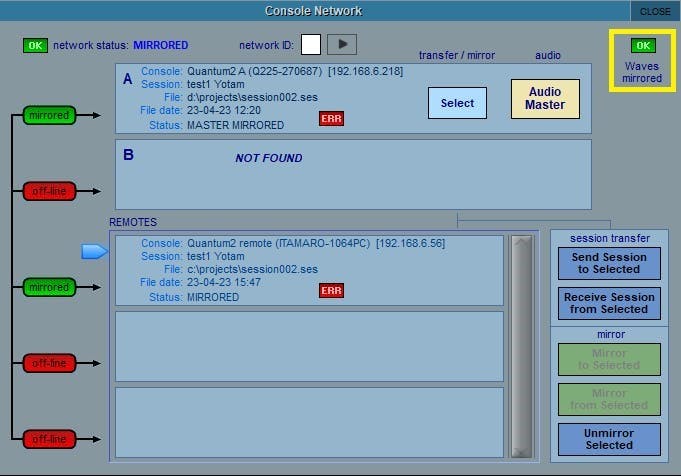
- When done, both Mirror Control modules in SuperRack A & B should read: "Mirroring Established" and the console's network window should show 'Waves Mirrored' with a green OK.

Need any further assistance? Contact our Technical Support team.