How to Mirror MultiRack SoundGrid on DiGiCo SD7
Oct 19, 2020
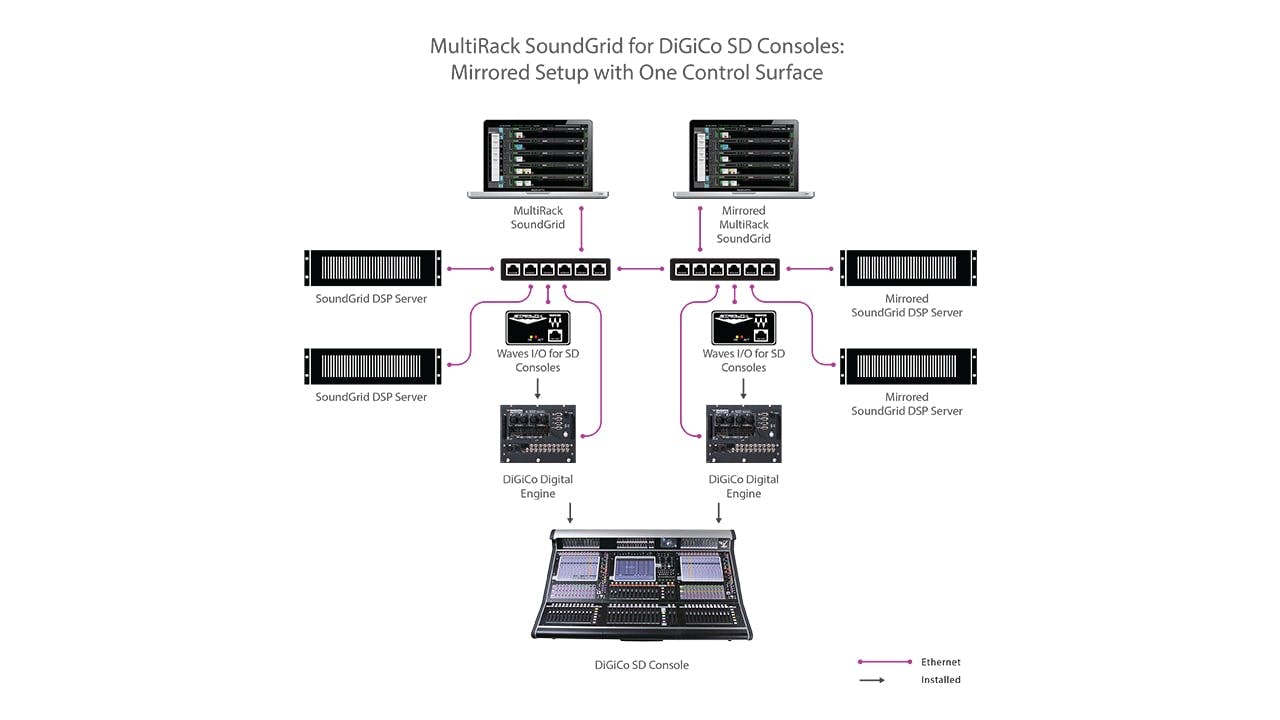
Follow these instructions to set up a fully redundant DiGiCo SD7 & Waves MultiRack SoundGrid setup, incorporating two mirrored SD7 engines with separate, yet mirrored Soundgrid setups.
Important note: The last Waves plugin version supported in MultiRack is v10.
Shopping List
Let’s start with a list of all the hardware, software and peripherals you will need to set this up:
- One DiGiCo SD7 Console with two Waves I/Os for DiGiCo SD Consoles, one on each engine. Both engines must be SD version V987 or above.
- If you have DiGiCo SD7 Quantum engine/s click here for specific connections
- Two computers, either Windows or Mac that fully support MultiRack SoundGrid, each with:
- Multirack SoundGrid installed and licensed separately on each host computer
- Two Identical bundles of Waves plugins, installed and licensed separately on each host computer
- Two USB Flash drives for Waves licenses (optional)
- Four SoundGrid Servers to process plugins, we highly recommend they all be of the same model and generation.
- Two servers are a valid and supported setup, but will only provide engine mirroring redundancy, not server redundancy per engine
- Two identical SoundGrid supported network Switches
- Eleven SoundGrid compatible Ethernet cables at supported lengths (you should always have a few extras with you). Nine cables if you choose to use only two servers.
Setting up
- Install and Activate Waves MultiRack SoundGrid and Plugins on both host computers:
- Make sure both computers are fully supported for running MultiRack SoundGrid V9 and Waves plugins in the version you own (Version 10 / Version 9)
- Install and activate Waves licenses on host computer A:
- Download Waves Central and follow installer steps to install.
- Open Waves Central and select “Install Products”
- Under "1. Install from" Select "Online"
- Under "2. Choose Products to Install" select "All Waves Products".
Search for the following, selecting each result so it appears under "3. Selected Products" - Click “Install”
- On top menu, select "Licenses" > “Manage Licenses.”
- Select licenses for MultiRack and for your bundle/s or plugins in your Cloud and send to the host computer or to a USB key.
- Repeat on Computer B! Versions of MultiRack and plugins must be the same on both MultiRack systems.
- Connect the network:
- If you have DiGiCo SD7 Quantum engine/s click here for specific connections
- Mark all your hardware and cables! Associate switches and servers to Engines A or B.
- Connect the following to Switch A with compatible ethernet cables at supported lengths:
- DiGiCo Digital Engine A
- Waves I/O A
- Host Computer A
- Server #1 – A Primary
- Server #2- A Redundant
- Connect the following to Switch B with compatible ethernet cables at supported lengths:
- DiGiCo Digital Engine B
- Waves I/O B
- Host Computer B
- Server #3 – B Primary
- Server #4- B Redundant
- Power everything up.
- Do not connect an ethernet cable between Switches A and B for now!
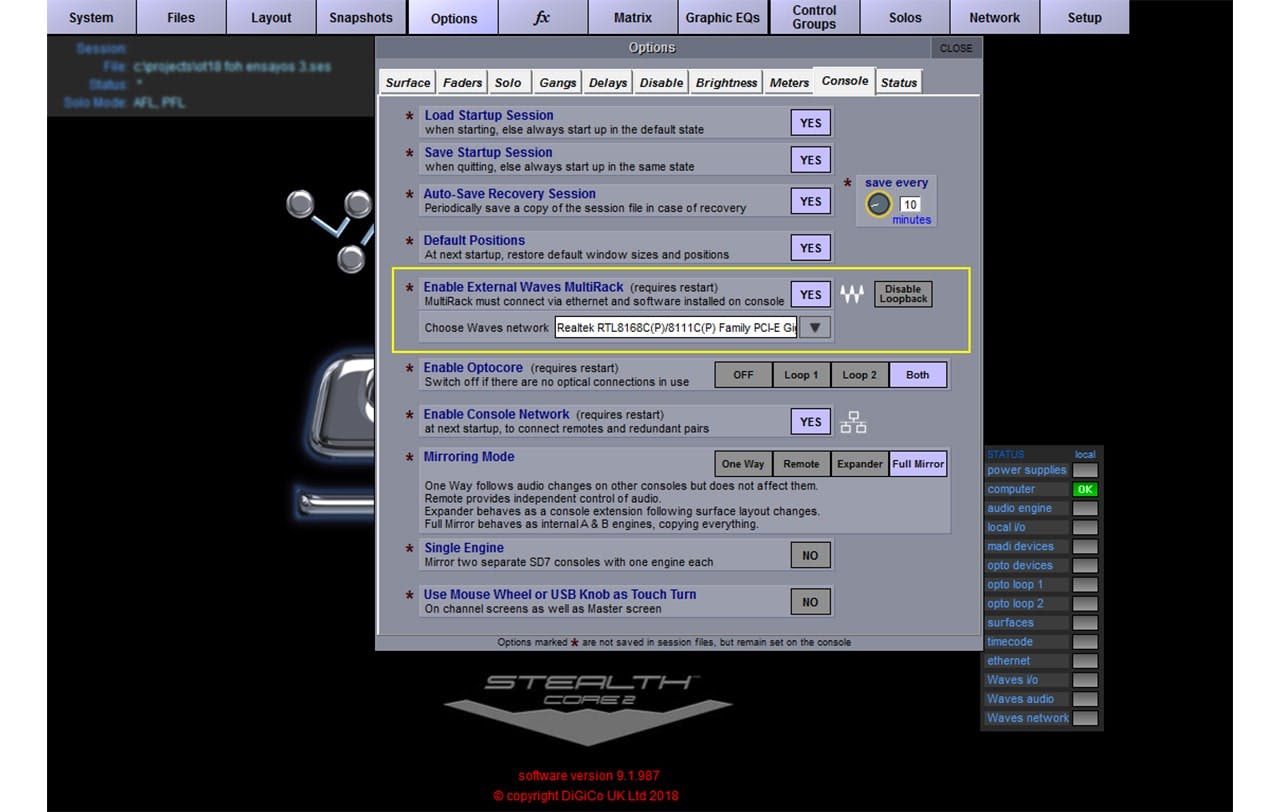
- Set up Waves on both SD7 engines:
- On Engine A, go to Options>Console tab
- Under Enable External MultiRack click YES and make sure the NIC of the console is chosen as Waves network.
- Restart Engine A
- Repeat steps a-c on Engine B
- Set up MultiRack:
- Launch MRSG on Computer A
- Go to MultiRack>Preferences>General Tab and choose the host computer’s LAN port that is used for SoundGrid. When a valid SoundGrid port is recognized, there will be a prompt stating: “SoundGrid Network Found"

- Go to MultiRack>Preferences>Remote Control tab and choose the same LAN port used for SoundGrid, Assign to “1”.
Click "Apply"
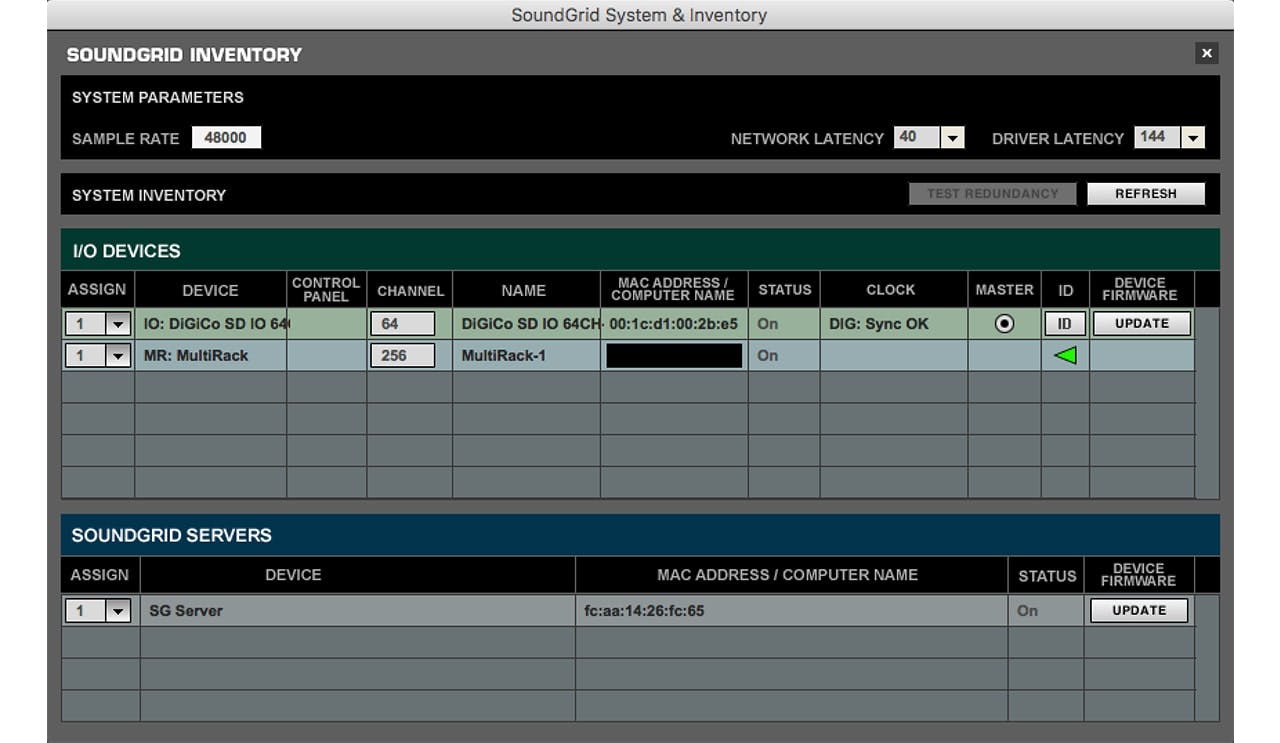
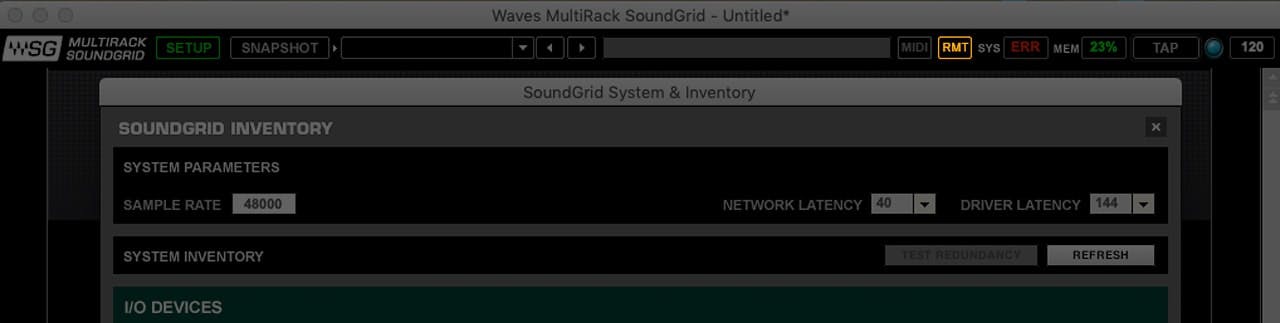
- SoundGrid Inventory Page (F2): Use the MultiRack Inventory page to assign I/Os and servers to the SoundGrid network.
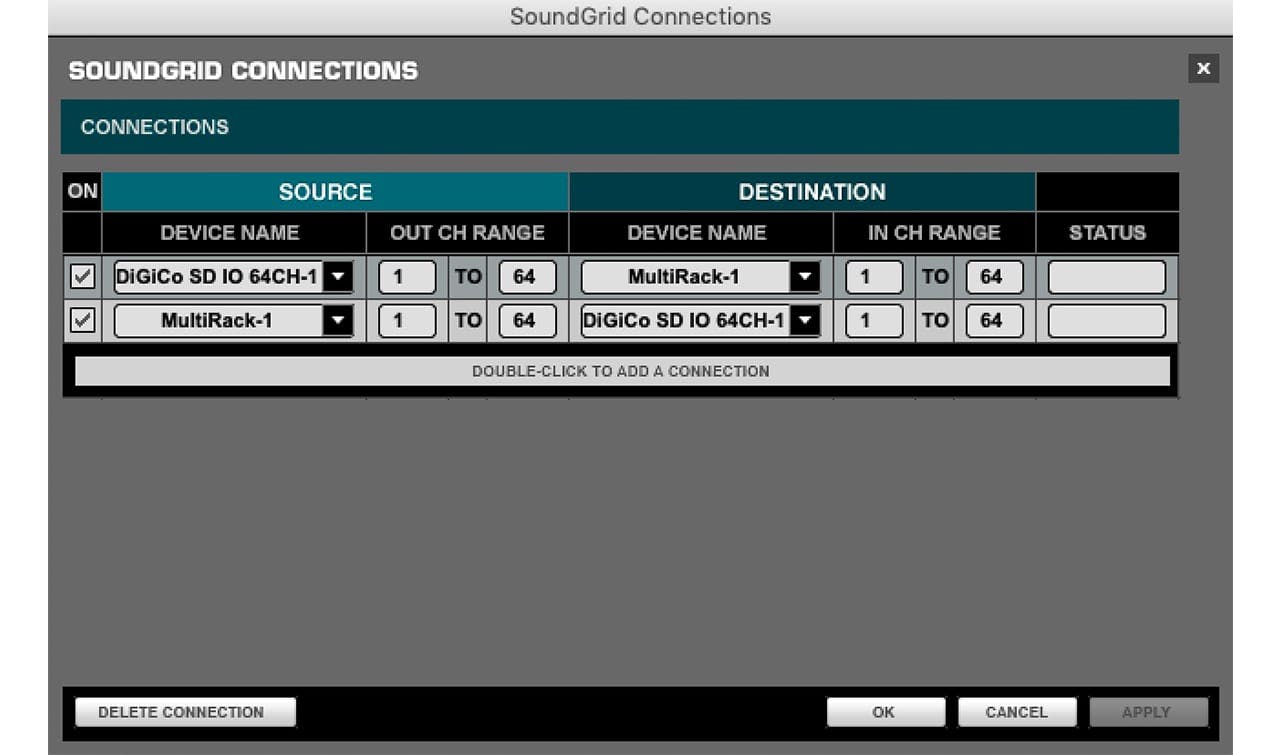
- SoundGrid Connections Page (F3): Open the SoundGrid Connections page to establish the link between the console’s I/O and MultiRack. Patch in both directions: MultiRack to console and console to MultiRack.
- Once a connection has been established, the Remote (RMT) LED on the Top Bar will be black with orange letters. MultiRack will display an alert if it encounters synchronization problems.
- Repeat steps a-f on Computer B!
- Connect a compatible ethernet cable between Switches A and B
- Set up Engine Mirroring:
Each engine now has its own complete, synchronized MultiRack system as set up above. These are separate systems, but communicate via the SoundGrid network.
Set up SD7 engine mirroring per DiGiCo instructions (Page 1-10 in the SD7 manual).- Send Session To > DiGICo's .ses session is copied to and opened in engine B, and MultiRack's .mrdb session is copied to and opened in computer B. (a temporary .mrdb file is created on computer B. the session will be saved and get it's name only after "Saving" the session on the console)
- Mirror To > engines sync and MultiRacks are now fully mirrored. Witness any action done on Engine / MultiRack A reflected on Engine / MultiRack B and vice versa.
Switching between engines is handled by the console’s Engine A / Engine B Control.
Loading and Saving Sessions
Sessions are saved on the MultiRack computer and are loaded when the console sends a request. If a session with the same name already exists in the Integrated Sessions folder on the MultiRack computer, that session will load.
- If a file of the same name is not present on the MultiRack computer, an empty session will be created but it won’t be saved. You will need to save the session again from the console so that a session with the same name will be saved on the computer as well.
- Synchronized session files are saved on the MultiRack host and the console.
- An “SES” file is saved to the console computer: (D:\Projects).
- An “.mrdb” file is saved on the MultiRack computer.
- Mac: /Users/Shared/Waves/MultiRack/Integrated Sessions
- PC: C:\Users\Public\Waves Audio\MultiRack\Integrated Sessions
- Refer to the manual to learn how to:
- Copy console session files to MultiRack computer
- Convert the snapshot titles in a MultiRack session to work with the new DiGiCo Integration format